Identity and access management can become overwhelming as your organization scales. SCIM (System for Cross-domain Identity Management) offers a standardized way to handle user and group provisioning, updates, and deprovisioning. With SCIM integration, Hoppscotch connects directly to your Identity Provider (IdP), helping you manage users and group memberships in one place and reflect those changes across systems.
SCIM support in Hoppscotch
Hoppscotch supports SCIM 2.0 push provisioning for the following resources:
- Users (
/scim/v2/Users) for creating, updating, and deprovisioning users.
- Groups (
/scim/v2/Groups) for creating, updating, and deleting groups, and syncing group membership.
Setting Up SCIM Provisioning
Follow the steps below to configure SCIM-based user provisioning in Hoppscotch and integrate it with your Identity Provider (IdP).
1. Enable SCIM in Hoppscotch
- Open the Admin Dashboard and navigate to the Configurations section.
- Find the SCIM Provisioning option under User Provisioning block and enable it.
- Copy the SCIM Base URL (
http(s)://<backend-URL>/scim/v2) provided after activation, as it will be needed for the integration.
2. Generate an InfraToken
- Go to the InfraTokens section of the dashboard.
- Create a new token for SCIM-related operations.
- Copy the InfraToken and store it securely, as it will be used to authenticate SCIM requests from your IdP.
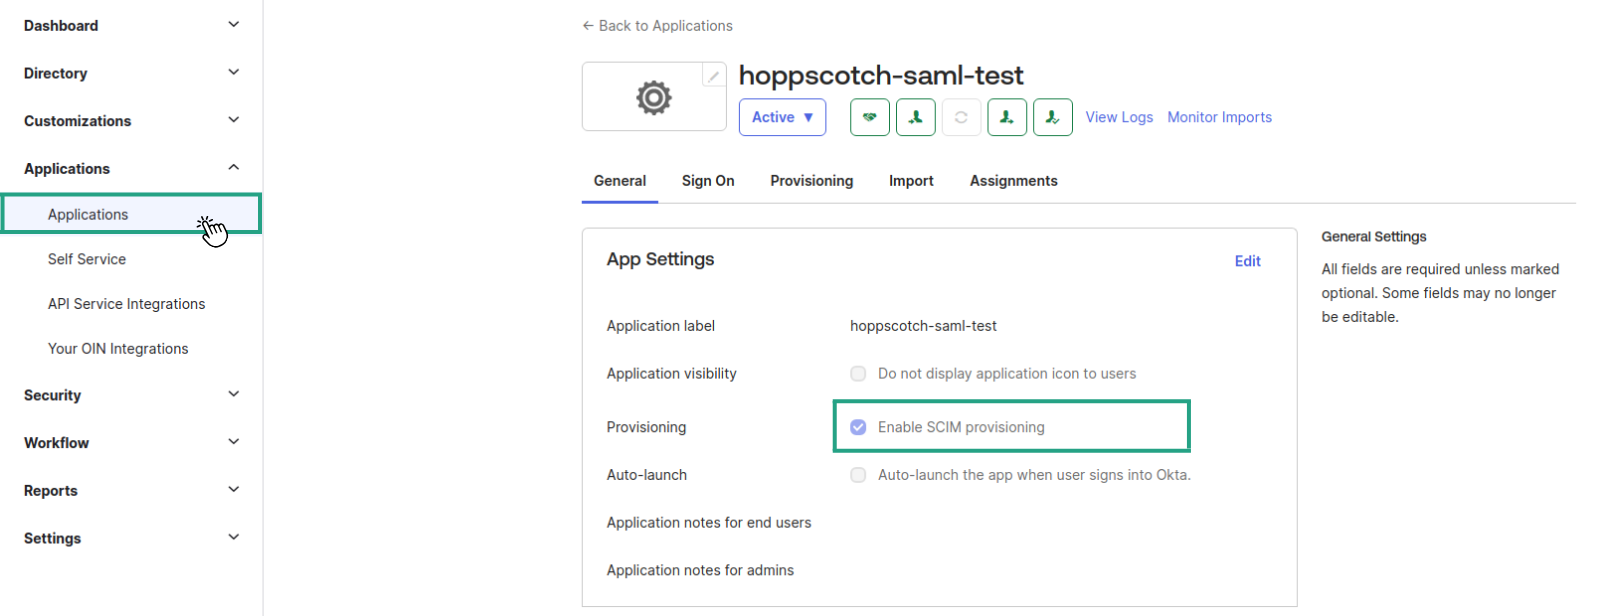
- Log in to your Okta dashboard, select your application, and navigate to the application’s settings.
- Enable SCIM provisioning under the General tab.
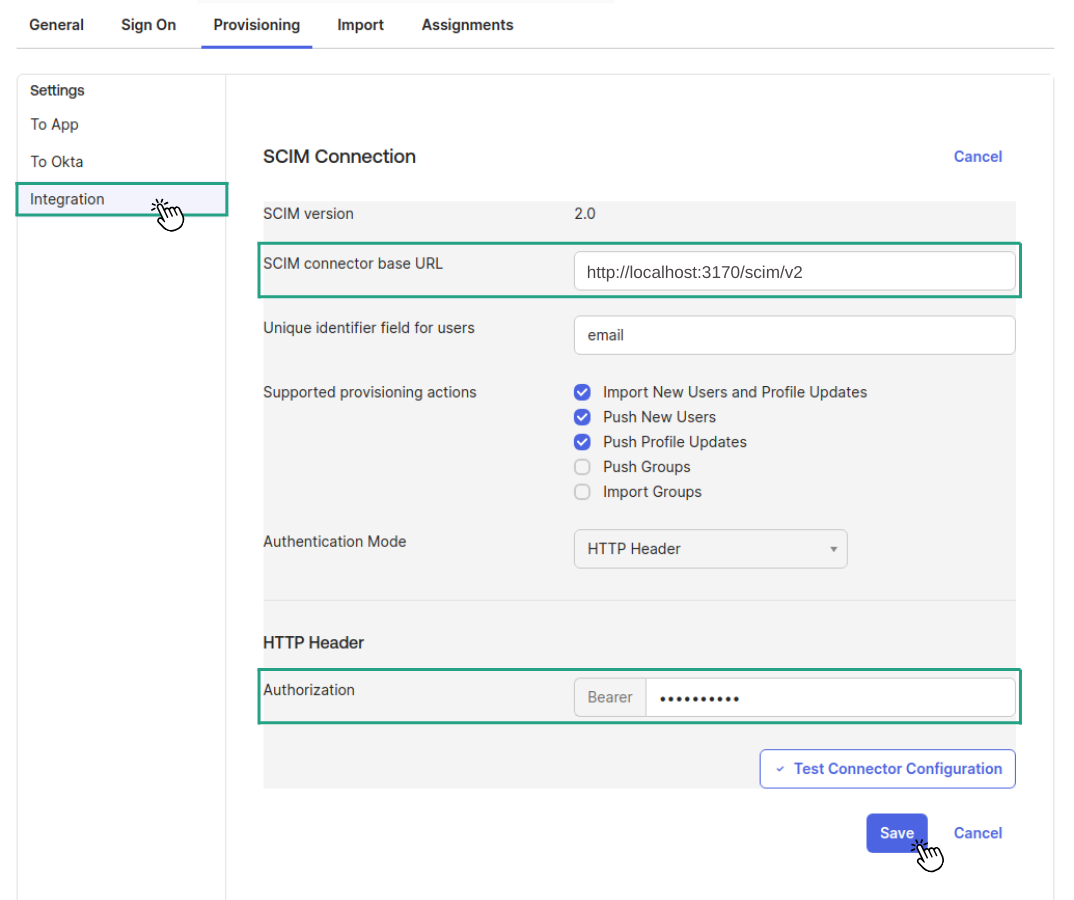
- Go to the Provisioning > Integration section:
- Paste the SCIM Base URL you copied from Hoppscotch.
- Specify the unique identifier field for users (e.g.,
email) and configure provisioning actions (e.g., Import New Users, Profile Updates, Push New Users, Push Profile Updates) according to your requirements.
- Use the
InfraToken generated in the Hoppscotch Admin Dashboard as the Authorization Token and save the configuration.
- Under Provisioning > To App, enable the following actions:
- Create Users
- Update User Attributes
- Deactivate Users
- Push Groups
Save the settings once done.
SCIM Group push provisioning
SCIM Group push lets your IdP (such as Okta or Azure AD) provision Hoppscotch UserGroups and their members through /scim/v2/Groups.
Supported Group endpoints
GET /Groups/:idGET /Groups?filter=displayName eq "..."POST /Groups (idempotent; existing groups are reused by displayName)PATCH /Groups/:id (RFC 7644 PatchOp for member add/remove/replace and group rename)PUT /Groups/:id (full replace of displayName and members)DELETE /Groups/:id
Member resolution behavior
- Group members are matched by the returned SCIM user
id when available.
- If a member user is unknown, Hoppscotch finds or creates the user using the email in the member
display field.
- This ensures group push can create missing users and then attach them to the provisioned group.
Notes and scope
- Group identity is synced using the SCIM resource
id and unique displayName.
- Linking a provisioned user group to a Team remains a manual admin action.
- SCIM feature gating and token auth follow the same setup used for user provisioning.
Add a custom attribute
SCIM supports extending the user schema to include custom fields to meet your organization’s specific requirements:
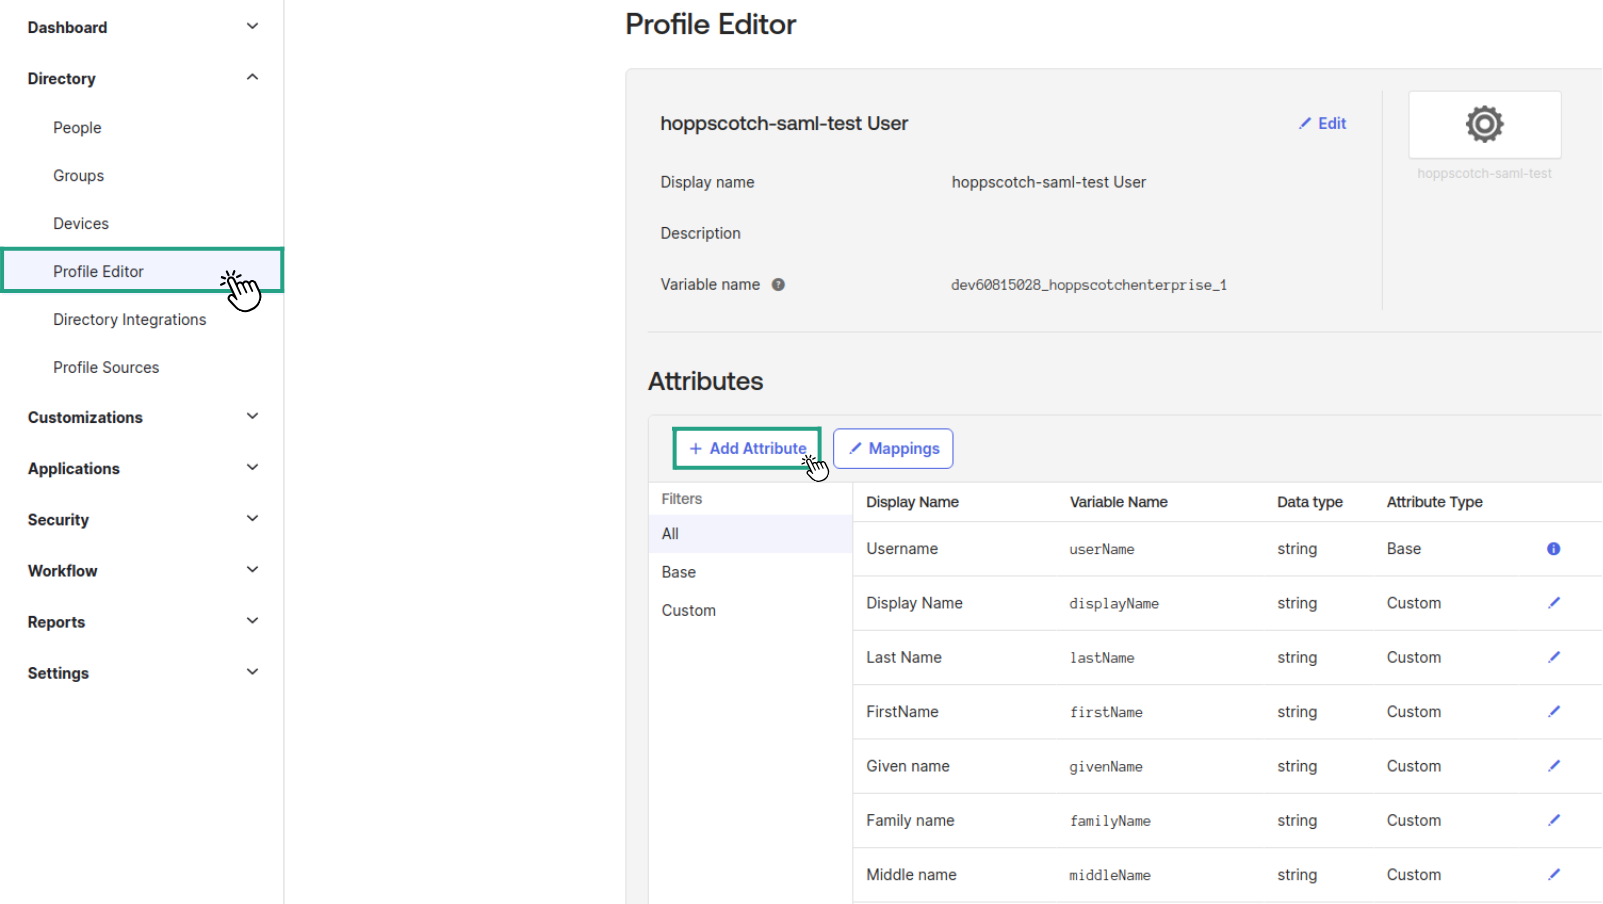
- In Okta, head to Directory > Profile Editor and locate the SCIM application.
- Click Add Attribute to create a custom attribute you wish to include in the provisioning process.
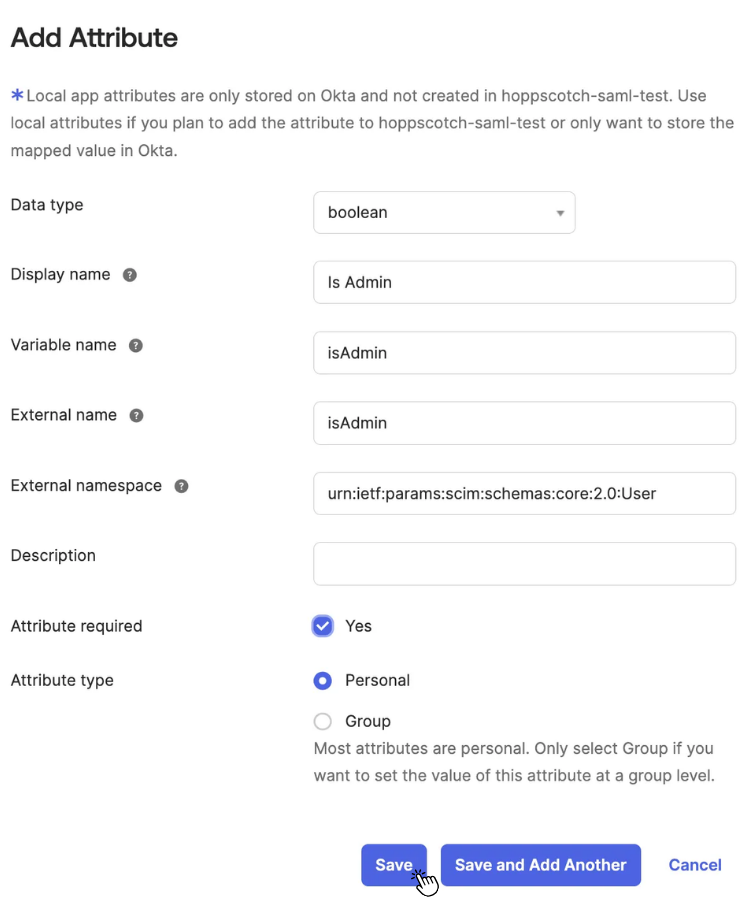
- Fill in the required fields and assign a valid External namespace. For SCIM 2.0, the following namespaces are supported in Okta:
- Once finished, click Save Attribute to apply the changes.
The custom attribute will now be automatically synchronized during user creation or updates.
Once configured, assigning users and groups to the application triggers provisioning in Hoppscotch. Users can be created or updated automatically, groups can be pushed with membership sync, and unassigned users can be deprovisioned from your instance.